Saturday, April 23, 2011

Stitchbow Organizer

Recently I invested into a wonderful product called Stitchbow. It's a floss/thread organizer for cross stitchers and embroiders. The only way I ever knew to organize was to do it myself, but it's difficult to find the thread when it's between 6 - 10 different drawers, and it's always messy, and using those cardboard bobbins are a pain to wrap everything around, and a pain to maneuver through.

I saw Stitchbow on Herrschners.com (which is very behind in the times, I got everything, but they took my money prior to sending me an invoice or confirmation of my purchase) and basically you buy Floss Holders, and then you buy Binder Inserts.

Here is an example of the Floss Holders (sold in packs of 10), notice that the floss attaches just like the string is purchased from the store, no wrapping around a bobbin! (That's my favorite part!) On the side you can see that there is spot for the DMC # to go, so it's clear and easy to see what color you're looking for.


And here is what the insert looks like after you put in 15 Floss Holders:


It took me a little bit (5 hours, give or take), but I put all the colors I have on Floss Holders, and then put them in numerical order (i.e. I separated them into 3 separate piles, then smaller piles, then orders those piles, lots of piles). It sounds like a lot, but honestly I really like organizing so it was fun for me. Here's the finished product:


I need a bigger binder as you can tell, or at least a second one. Anyways, there are all my threads, a total of 244 different colors after the last 3 - 4 years of collecting on different types of projects. There are a total of 455 normal DMC colors, I made a chart in Excel so I can keep track of what colors I have/need in case I start a new project I can just look at my Excel file and see if I have that color or not prior to looking in the binder. Here's a sneak peek:


It's a very simple each column has a number set (i.e. 100s - 200s, 300s, 400s, etc.) and then it just goes down the list in the DMC order, and there's an 'x' if I have it and there isn't an 'x' if I don't have it, and I colored the ones I needed in red so I knew what I needed to pick up if I did.

Hope this helps someone with organizing some of their floss (if you embroider or cross stitch), and honestly I really like this Stitchbow product so far.
Published with Blogger-droid v1.7.1

Saturday, April 16, 2011

Cross Stitching 2

Recently out of the 99 Cross-Stitch Luvable Pets by Linda Gillum
book I found an adorable pattern. It took me about 4 - 5 hours to finish. Here's a small "creating of".


The colors requested were DMC 151, 310, 792, 816, & 3731. I didn't have those colors, so I used instead DMC 3326, 310, 792, 3733, & 899. I also outlined the paw prints ON the heart with black instead of the same outline color of the heart because it wasn't showing up as well as the picture (probably since I switched up the colors.

Oh, and after doing 40 French Knots on this thing I think I have them down, which is good because I could never do them before, I saw a tutorial on YouTube by Expert Village on How to Cross Stich: How to Do French Knots in Cross Stitching which was extremely simple and helpful.

Hope you like the finished product! <3

Wednesday, April 13, 2011

Rice Box

I had Chinese food the other day, and had the left over box. While searching through craft sites I've seen a few examples of people redecorating them and turning them into a jewelry box of some sorts. I took the left over rice box and cleaned it out, and decided to paint it. I did a base coat of white then painted over it with oil paints.


I had to let it dry for a few days, the only problem is that oil paint doesn't stick very well so when I went to go back over it I got paint all over my hands and the box.

Here's the finished product:


I really don't like the way it came out because of the lack of paint sticking and not drying. I tried spraying over it all with a clear glaze paint but it didn't settle it. I ended up tossing the finished product because it was making more mess than helping me store anything. I found a Take-Out Box pattern online that I'm going to try using, but I haven't decided what material to use to make it yet.

Shall update with one of those soon. <3

Saturday, April 9, 2011

Paper Flowers 2

I saw this while I was looking on StumbleUpon (Love that site), on Dozi's Blog.

It's another Paper Flower tutorial, that's super easy, fast, and just plan adorable!

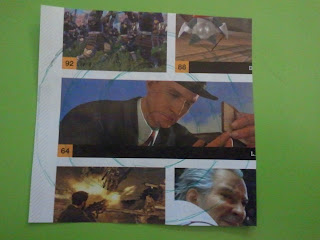
It was the first time I made them, so I used an old magazine (GameInformer to be exact). I'm just going to do the same basic tutorial Dozi did, but just used a different media.

First things first, pick a picture you want to use in the magazine, and cut a 4" x 4" section out like below.


Then draw (on the back) the circular spiral design that takes up the entire paper.

Cut it out, and turn it over so you can see the main picture.


Roll the paper up starting from the outside, and using glue or double sided tape (I couldn't get it to stay without it, I used double sided tape) get it to keep the shape. I made two in a matter of about 5 minutes...so it was really simple.

Here's the finished product!

These are super cute, super simple, and fun to do. I haven't figured out what I'm going to use them for...maybe I'll mess with some floral wire later and see what I get.

Hope you liked! <3
Published with Blogger-droid v1.6.8

Wednesday, April 6, 2011

Framed Artwork

I was looking on StumbleUpon and came across Two Girls Being Crafty in one of their more recent posts about framed artwork. I got to say I absolutely LOVE this idea.

I spoke to Keith about it and he agreed that we can do this for our new apartment (we're moving Memorial Day weekend, and he should be home from the Navy mid-June) in the dining room to jazz it up a little.

Previously we've done black poster board and scrapbook paper. We bought scrapbook paper, green & blue for the room (since we had green walls) and red & animal print for the living room (I just like the color red & love animal print, plus I already had tiger/cat pictures hanging in there.)

I got the scrapbook paper at Michaels


Then we put them on the black poster board, and hung them up. We used foam boards, actually..which was a pain to cut. Next time we're going to use poster board so it's lighter, and easier to deal with.

This is the finished product in our bed room.


And here is the finished product in the living room.

It looks great, and professional but only costs about a dollar a picture because the scrapbook paper was on sale! Got to love the deals! <3

When we create the framed version with the 3D embellishments I'll post pictures. I'm super excited!

Saturday, April 2, 2011

Cross Stitching

I started cross stitching in middle school when another class was assigned a cross stitching project on coloring in the different countries of a continent. I ended up doing about 3 of my friends because I actually enjoyed doing it, and they all hated it.

My best friend liked it as well so we use to find things we could create (I tend to get distracted easily so I haven't finished as many as I would like.

Here's one that I finished and gave to my fiance, Keith.


...and this one I have hanging in my office to remind me that sometimes you just need to relax.


I have a bunch of books that I can find designs out of. There are a bunch that I have plans to do but some of them are HUGE projects. Here's some of the books:

99 Cross-Stitch Luvable Pets by Linda Gillum
100 more Cross-Stitch Luvable Pets by Linda Gillum
80+ Cross-Stitch Kind Thoughts by Kooler Design Studio
101 Alphabets by Dale Burdett
Cattitudes "The Thirteenth Litter" by Jeanette Crews Design
Magical Cross Stitch

I love Kooler Design Studio, they have a lot of cute little ideas that are fun and easy. I fell in love with the Magical Cross Stitch because of the fairies inside. I want to re-create this trio:


I'm in the process of attempting to finish the Dark Queen (the one all the way on the left), but the last time I did I messed up and now I have to start over. Trying to get the motivation to do so.

When I finish another design I'm going to post up a mini photo timeline of it being done. Hopefully that will be neat.

Hooray! <3
Published with Blogger-droid v1.6.8

Wednesday, March 30, 2011

Drawings

I haven't really drawn anything recently, but every once in awhile I like to pull out the sketch book and doodle. I don't really plan on what I'm going to draw, I just do.

Here are some examples of what I found in my sketch book when I was looking the other day.

This one started with the little dude up in the right hand corner, and how it got to where it is now, I have NO idea. My favorite part of this is how the magnifying glass/movie reel turns into DNA and then into music...I love that part.

This one started with the skull, and then I just got bored and went from there. On the bottom it's binary code...honestly I don't remember what it says, but it DOES actually say something. One of these days I'll stop being lazy and pull out the sketchbook and decipher it online.

I drew this crazy little guy when I was working in a telemarketing office and I got tired of people hanging up on me or yelling at me to shut up, or leave them alone. Telemarketing is fun, isn't it?

This is a more recent drawing (2010) of just a clock that for some reason is dripping out liquid of some sort.


This last one I actually intended on drawing it how it came out. I wanted to see if I could duplicate the Tiger Cub statue I have sitting in my livingroom. It was half hiding behind my stereo, so that's why I only drew half of it. I think it came out pretty good.

Well, there are just a few examples of things that I've drawn on my down time. When I was in high school I did a lot more art (drawing & painting) because I was in an art class and could get the supplies for free. I love painting, but it takes a lot of time, and a lot of money (paint is NOT cheap!)

Hope you like my drawings. I know I do! <3

Saturday, March 26, 2011

Wedding Planning

I got engaged on Dec. 26th, 2010, and I've been planning for the set date of April 21st, 2012. The one problem is my mind is stuck on decorations more than anything else, just because it's the most inexpensive and FUN part of it all (minus the actual wedding itself).

Annnnyways. My name's Nikki and I really like crafty things. My problem though? I get distracted easily from the crafts I'm doing so when I finish something it's always really nice to show it off.

One of the first projects I found was off the Martha Stewart website, with paper roses. You use coffee filters, some floral tape, floral wire and water colors to create these amazing creations. They're a tad challenging to make but very rewarding. I made 3 or 4 so far, here are some that I made.


I pre-printed out the templates from the website and attached them to black poster board to make them stronger. I just hold them against the coffee filter and cut along it to get the petals. In total there are 6 different templates, and you will use 8 coffee filters per rose (template 5 & 6 are cut out twice).


Once the 8 coffee filters are cut you place them on the floral wire using the instructions (I watched the video, it was easier to understand what was needed) and use the floral tape to keep it there. The first 4 are the hardest part to do, after that it's just 3 petals at a time per level. It takes some practice to get the layering down so that there aren't a lot of blank gaps. The finished product looks like the rose to the right.


Once the rose is all put together you get all the watercolors. I use
Artist’s Loft™ 12 Pieced Watercolor Paint Set
that I got from Michael's for only $4.99. (This was a great buy since I wasn't sure what colors I was wanting to experimenting with. I picked purple as the main color for my wedding so I need to go back and buy just white and purple.) You have to put a base coat of a watered down white, then the watered down base color (the main color stands out more if you paint it white first), then you trace the non-watered down main color along the edges of the petals.

Once the painting is done it needs to dry for about 24 hours (I bend the wire and hang it up in the bathroom on the towel rack). Once it's dry the most important step to make it look real comes to play. Using a skewer (the ones for kabobs is what I used) and you curl the petals (at a diagonal from the point of each petal). When you curve all the petals you get the finished product.


I finished a few purple ones and one pink one, and I think they look gorgeous! Each one (not counting drying) takes about 40 - 60 minutes to do, so I can't do it that often between work and school...but they're very inexpensive, I believe I tallied it up to be approx .50 cents per flower? I plan on using these in my wedding centerpieces, which when I get closer I'll try to put up how I want that to be set up.

Hopefully this is a good first post, and I want to bring many many more to the board of discussion. <3